What is it? 
In the remote connection / VPN world, RSA tokens and other two-way authentication methods are used to increase security. At my work we have a box full of these tokens laying around. I had an old scanner laying around, and decided that it would be a good project to create someting that makes pictures of these RSA tokens for me.
I took a Raspberry PI and hooked it up to the camera module that was just released. The steppermotor of the scanner was reused and hooked up to a motor board from bitwizard.
With some code, a picture could be downloaded via FTP as soon as you got the filename from the protocol created for this project.
At my work we have created a Windows Forms application that is connected to our CMS and knows on what position a token is located in order to make a photo.
C++ code
The code can be found on my github https://github.com/timdows/raspberry-projects/tree/master/Scankoffer
The code is condensed into one file with 6 functions:
- int main
Creates a socket and opens a TCP port. It will listen for new connections and forks a child process on every incoming connection. - void processConnection
Handles all communication once a connection has been established. - string timestr
Returns a string to make filename of. - string execWithOutput
Execute a system command and grab the output of its return. - void writeToSockect
Write data back to the socket. - void error
Prints the error and exits the process.
Next to this, there is a ping daemon running to check if the WiFi connection is up and running. As soon as the daemon has a couple of ping failures to a server on the local network, it will bring the WiFi down and up in order to restore the connection.

End result


The flex ribbon on the side provides the power to it all

Also a DC-DC step down converter has been installed

What a dusty screen…
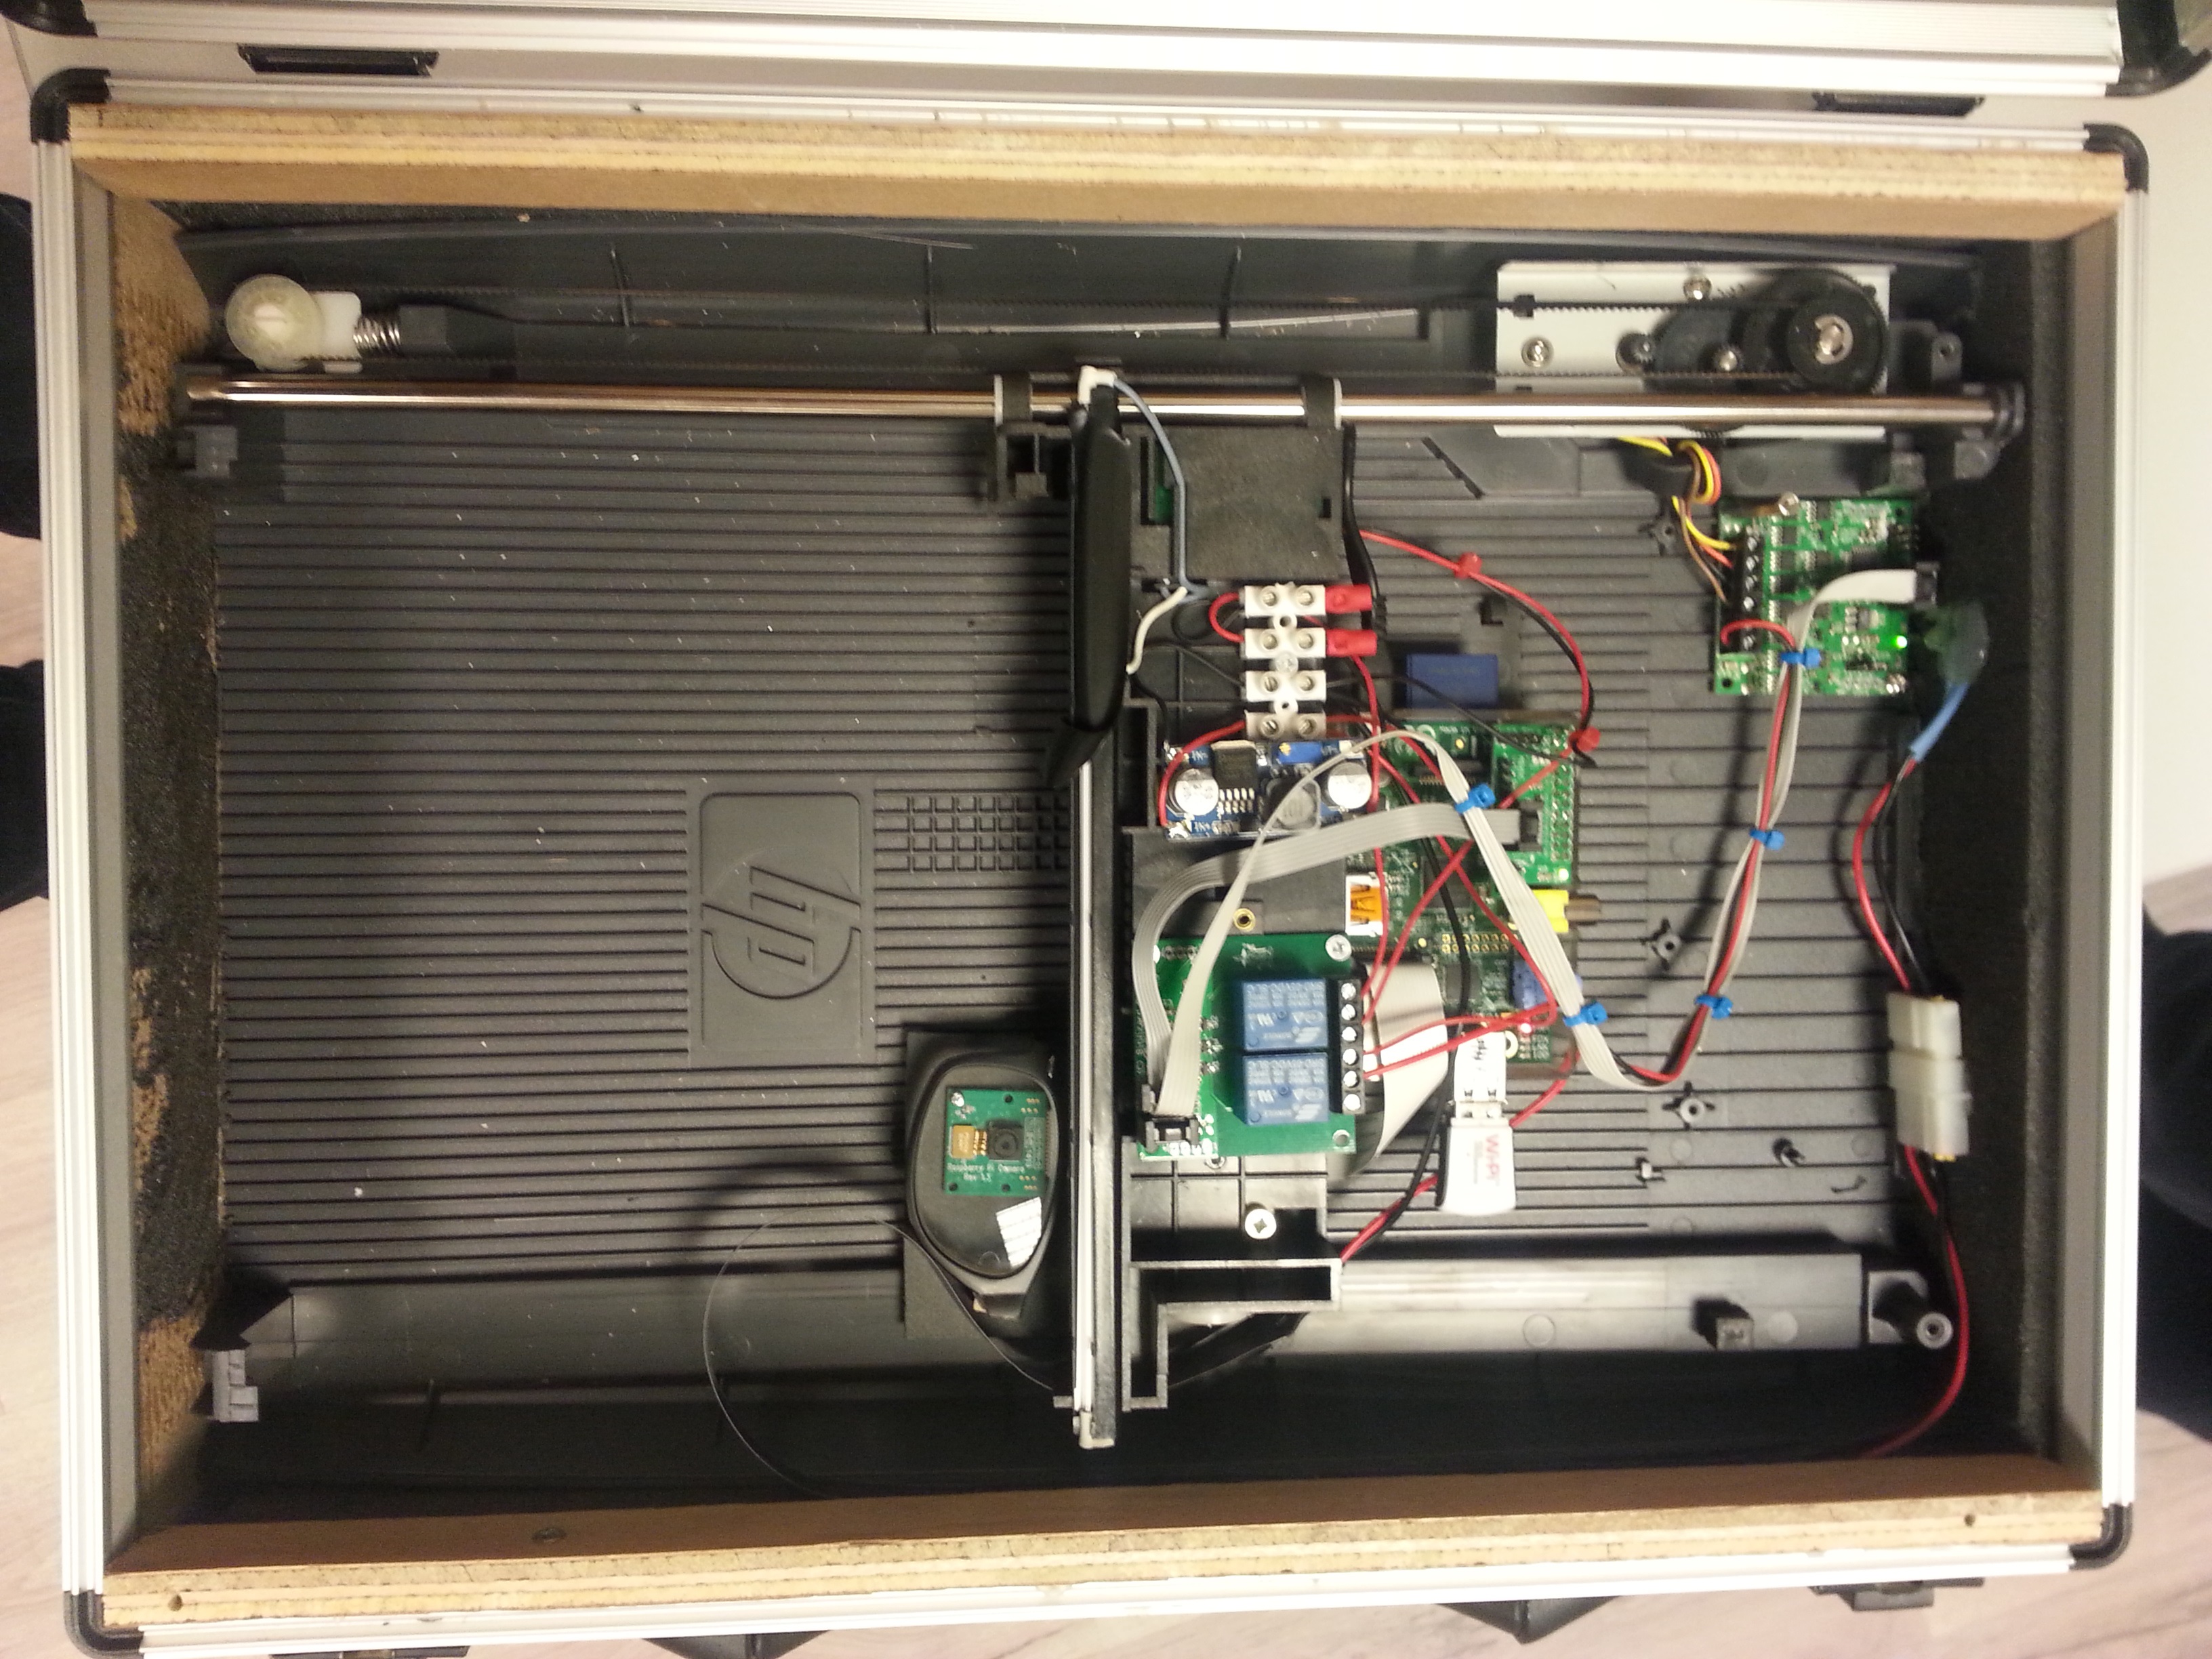
The 6 relay board has been replaced by a two relay board


The briefcase is most of the time closed, and we hear the relay for the CCFL from time to time ^^
TODO
- Could be cool if the scanner could have been expanded with another axis in order to scan more tokens
Project costs in € or $
| Object | Price |
|---|---|
| Raspberry Pi model B (512MB) | € 21 |
| Raspberry Pi Camera Board | € 25 |
| WiFi module | € 19 |
| Raspberry Pi Serial BoB | € 4.95 |
| Relay board | € 12.45 |
| Motor board | € 24.95 |
| Old scanner | € 5 |
| DC-DC step-down convertor | € 4.95 |
| Briefcase | – |
| Glasses | € 3 |
| Cables and other materials | € 15 |
| Total | € 135.30 |
What could be better
- As it was one of my first projects, it is really still a prototype used in a production environment.
With the time and money, a real product could be made of this prototype.
Comments are closed.