- Setup the PIA VPN itself
- Create a docker image to open the port via script
- Update the docker transmission settings for the new port
I wanted to have a network at home that is dedicated to an always connected VPN environment. For this I picked PIA as they offer port forward (well… I’ve been told…)
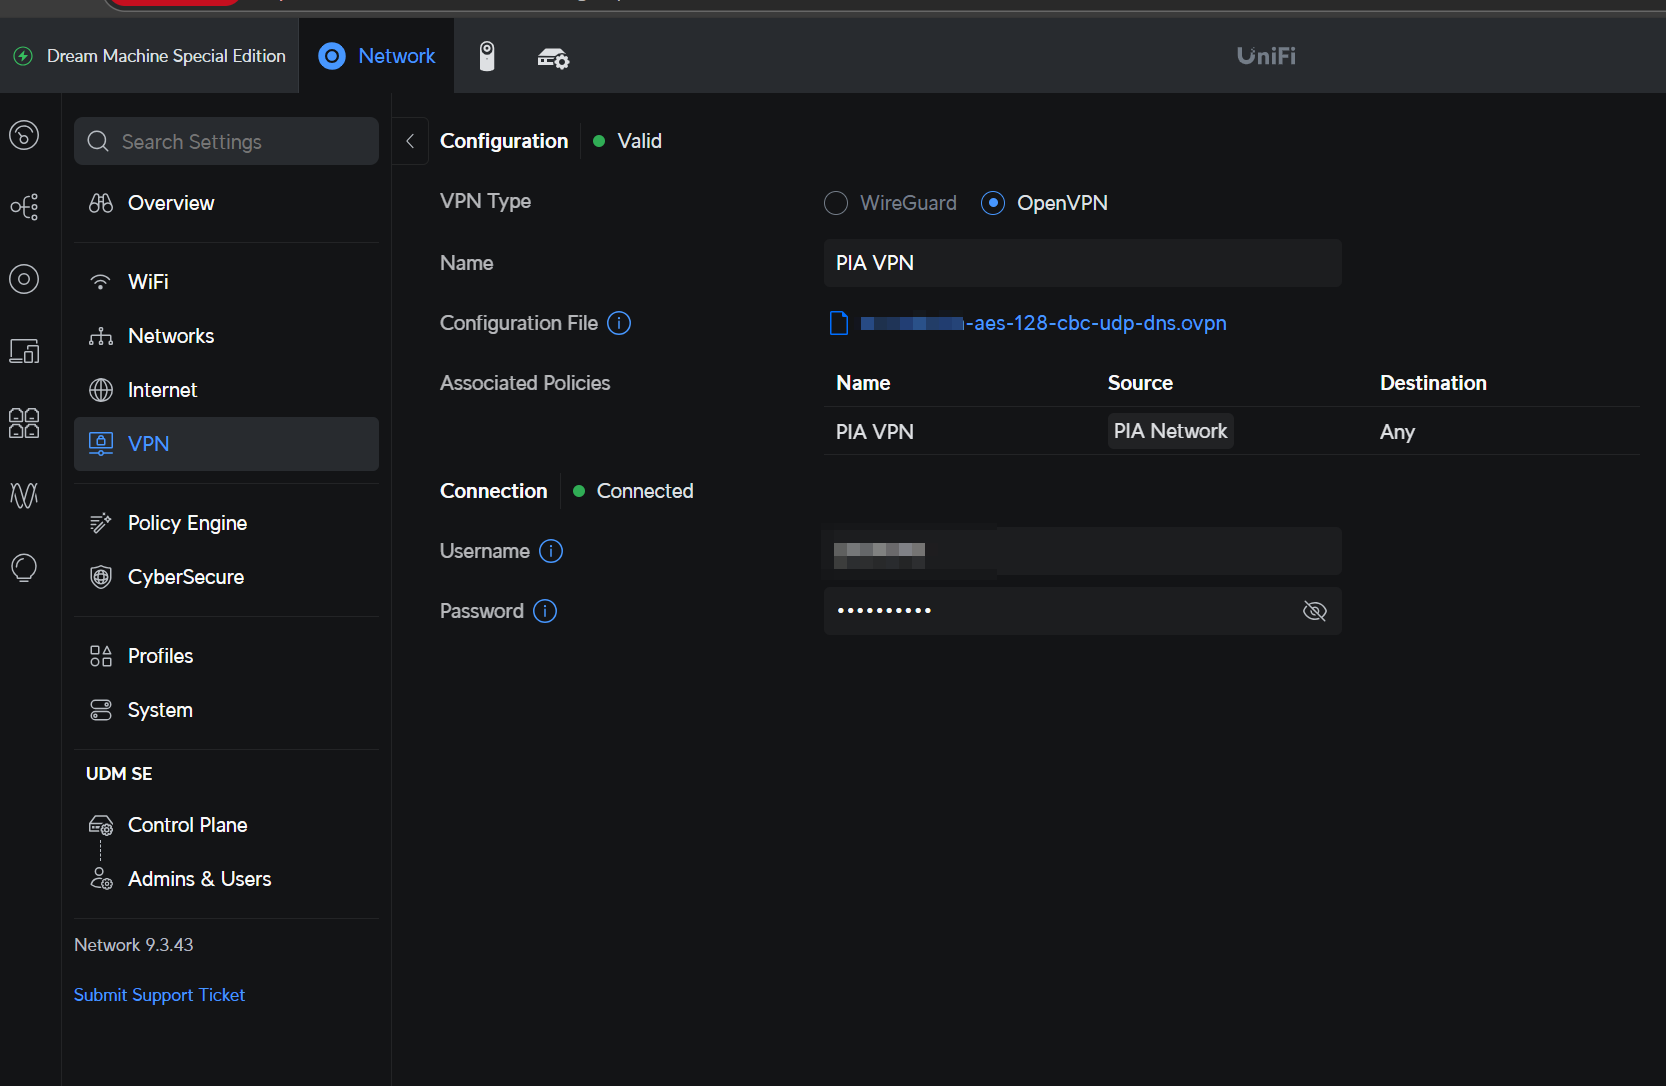
First I setup the VPN Client on my UniFi device
Next, I’ve created a new VLAN
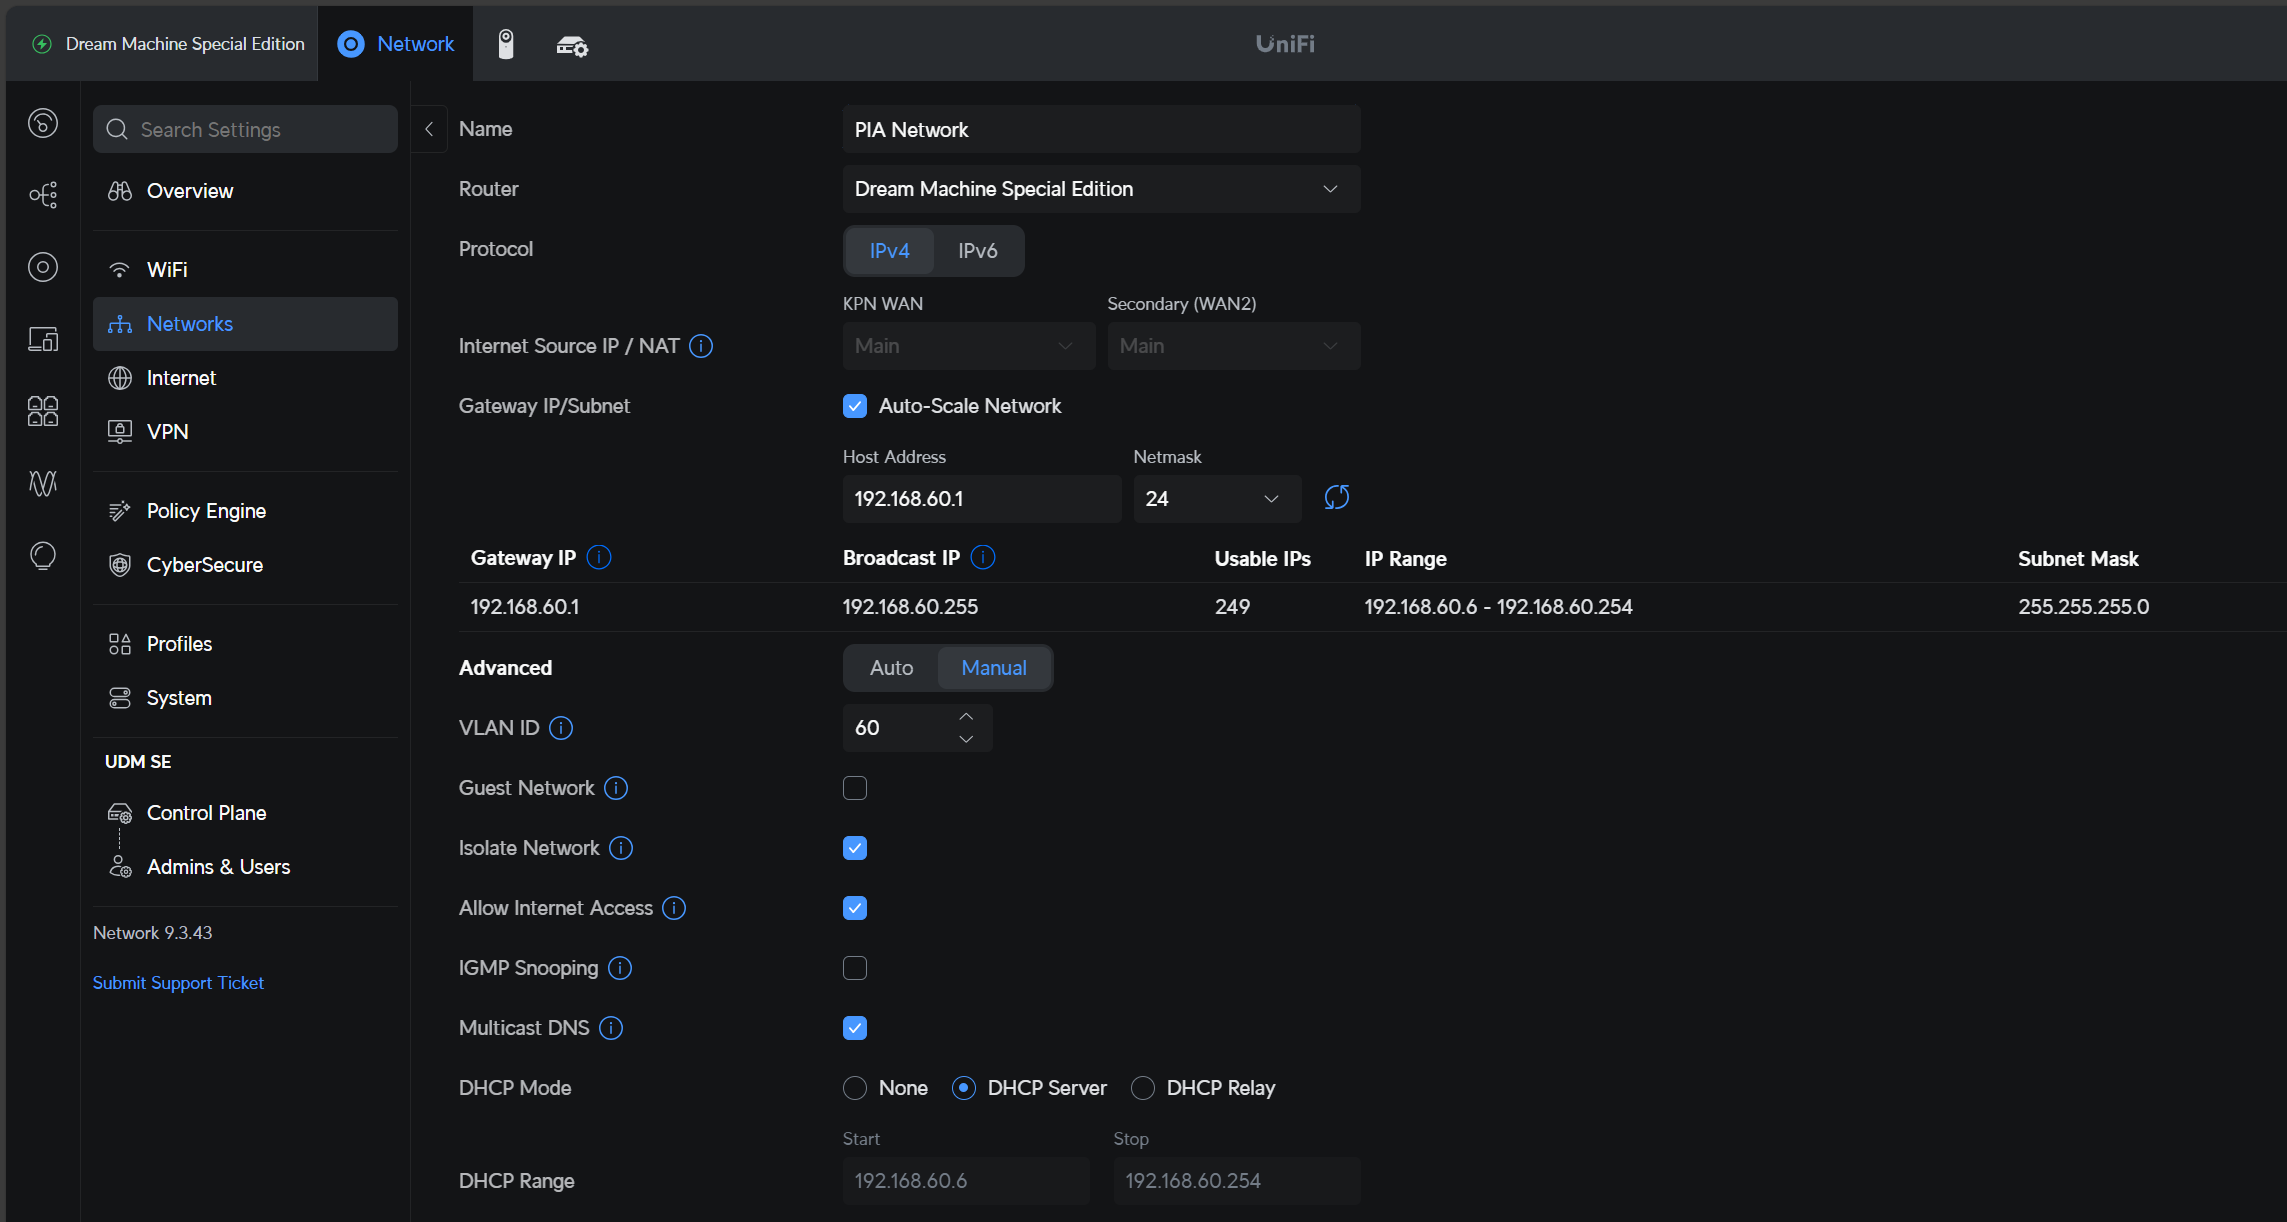
I have a large Unraid tower at home. A netowrk was created with the VLAN tag 60 for this
The PIA VPN then is set as a source for the PIA Network, i.e. all traffic from the PIA Network goes over the PIA VPN

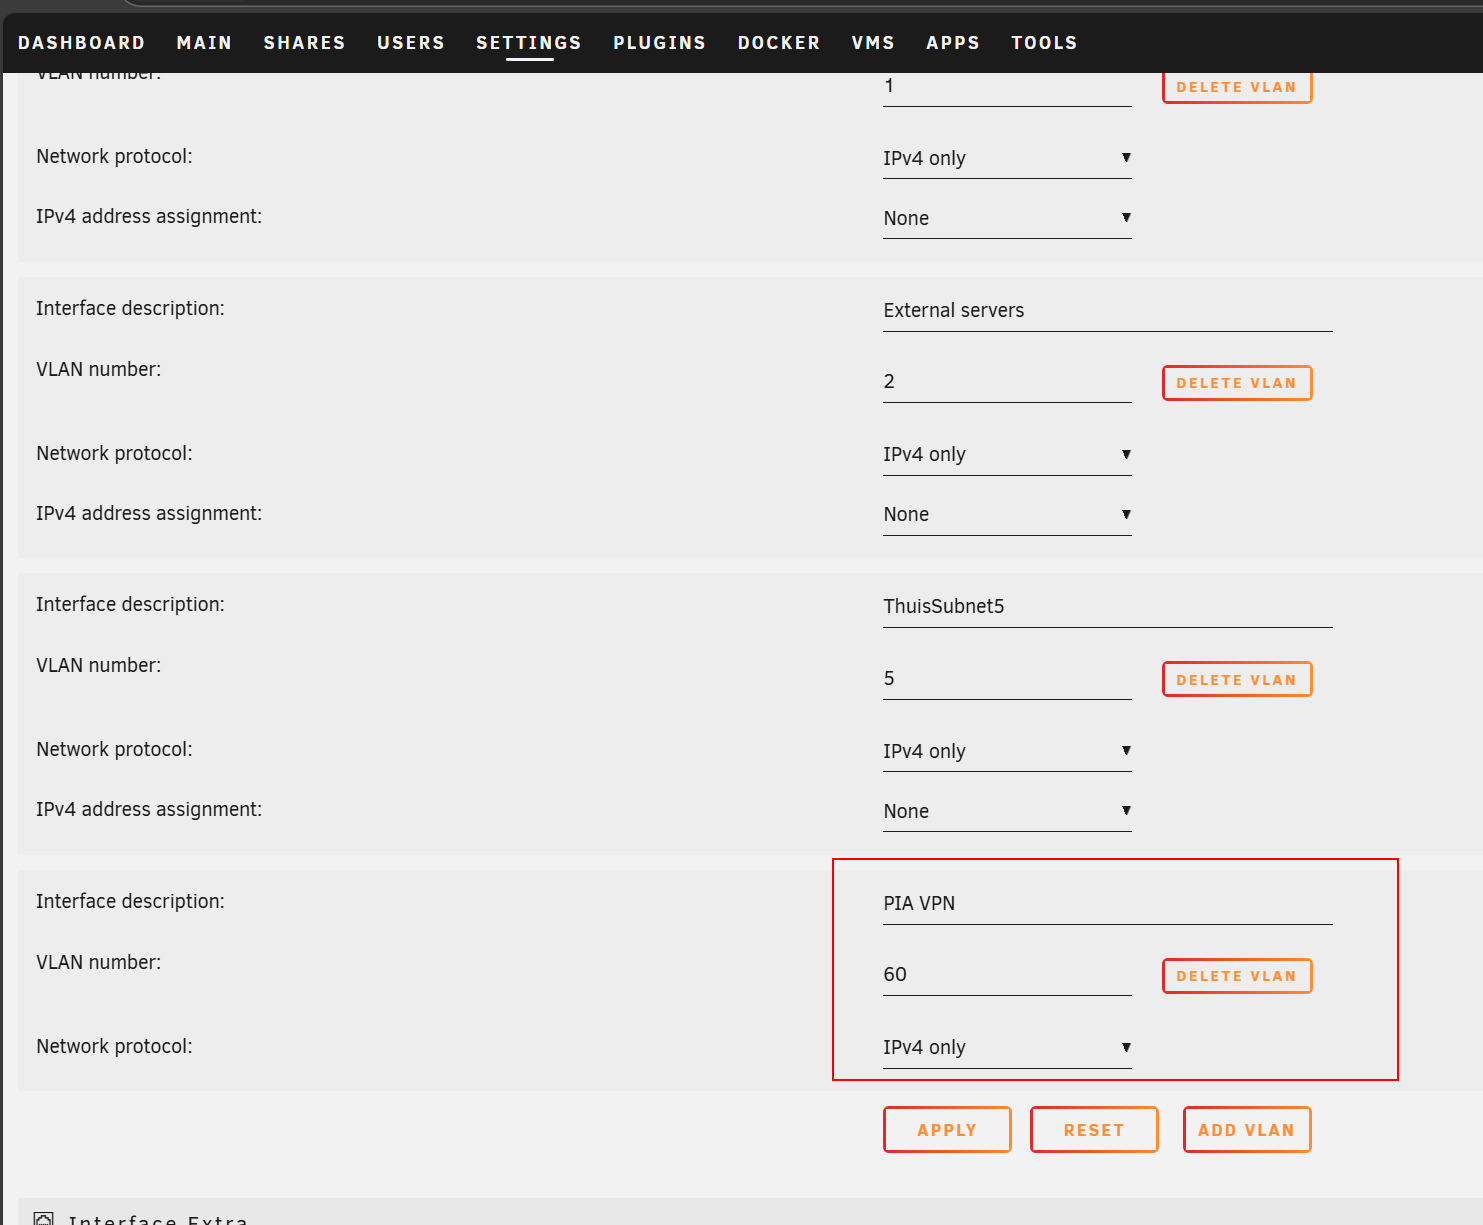
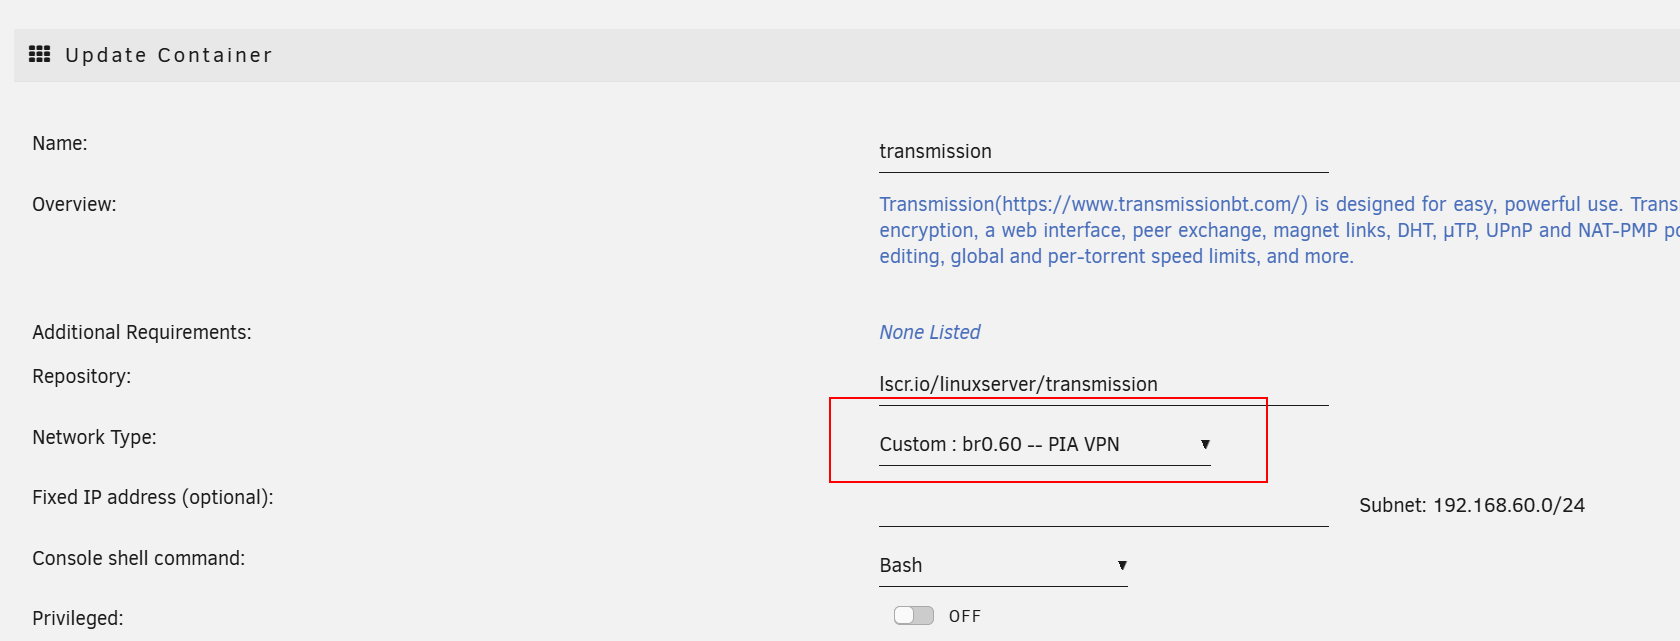
Then in the Docker environment, I can add the VLAN as network

When the array is started and the docker services are running again, I can configure some docker containers to use this network
In my case, I want transmission, a torrenting container, to be connected via this VPN
And then to confirm that this is working, I ran the following ip a && curl ifconfig.me command on the docker container shell
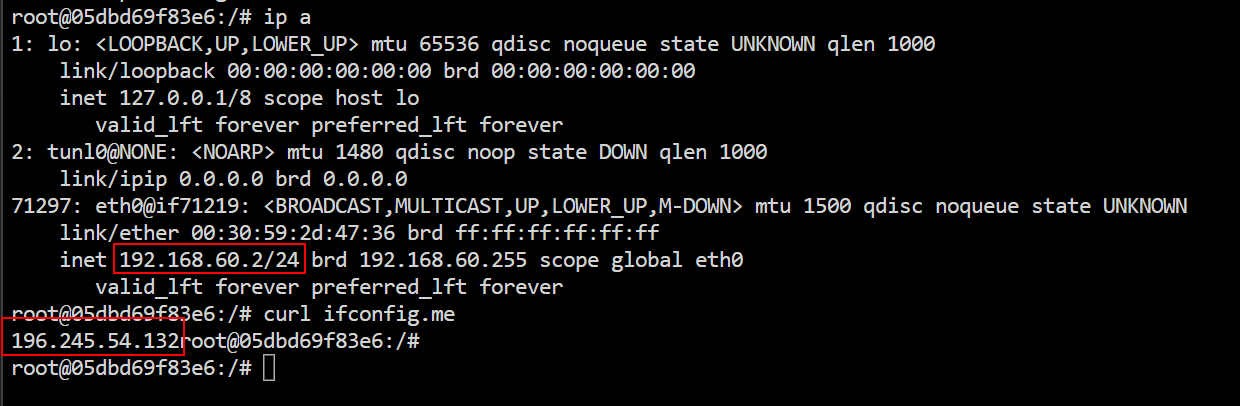
That seems to work perfectely
Docker repository try 1
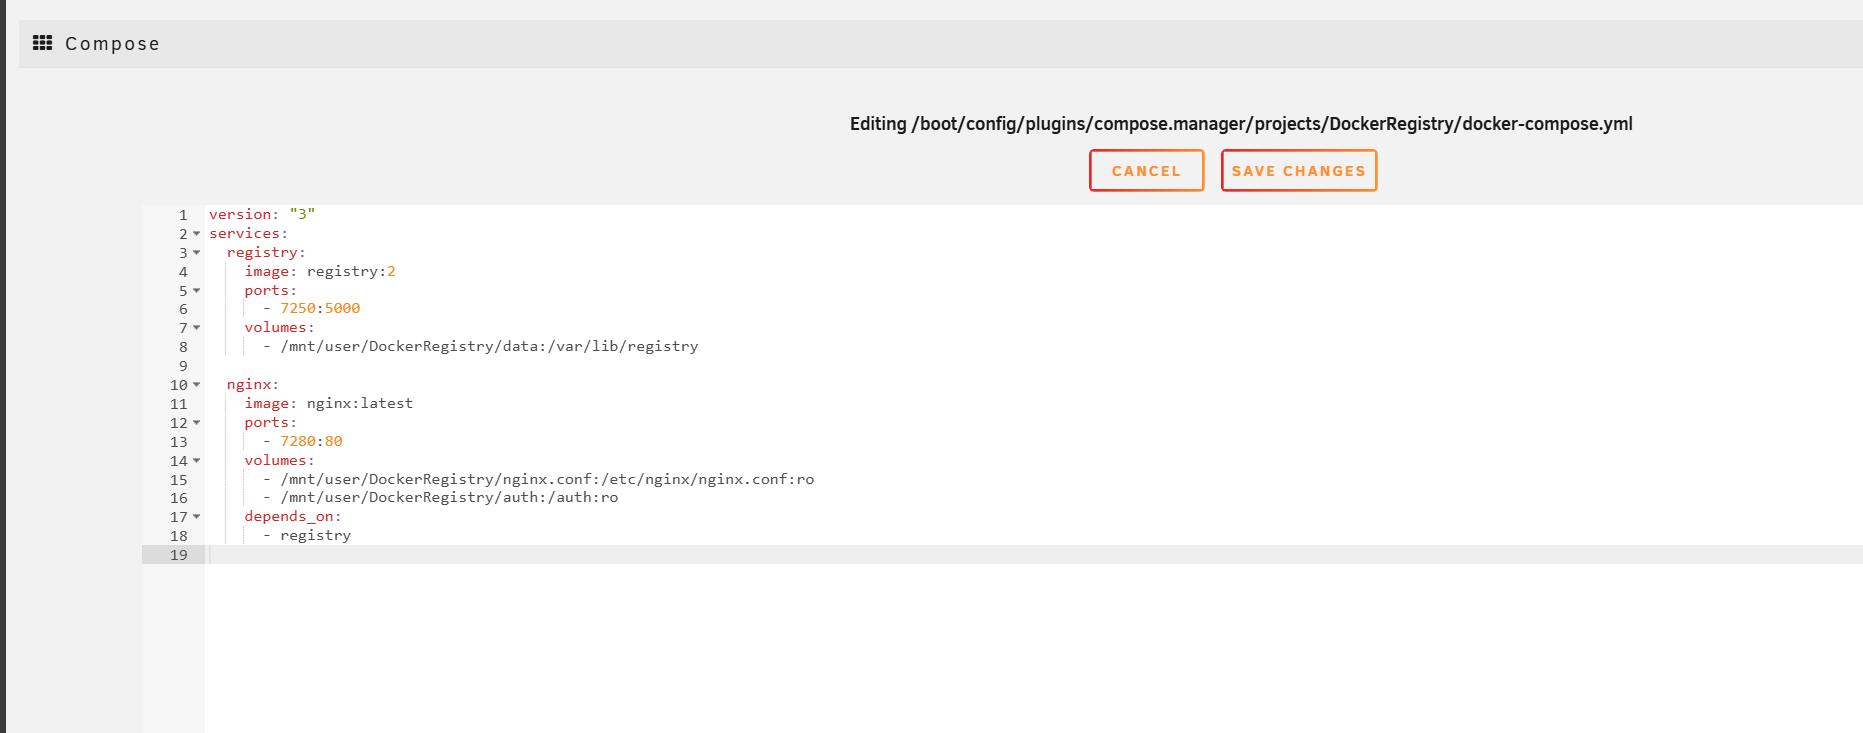
In order to create the docker image, we need to create a docker registry. For this I have used something like this How to Use Your Own Registry | Docker
But I had two requirements, I wanted to make it via docker compose on my Unraid server, and have some basic auth for a reader and writer user
And in order to create the contents of the auth files
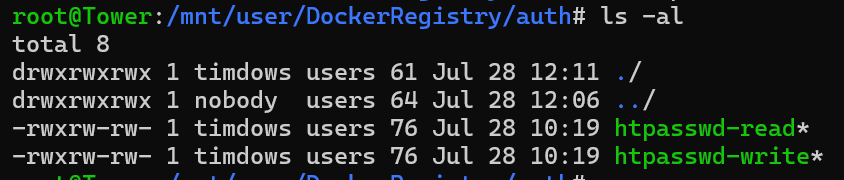
docker run --rm httpd:alpine htpasswd -nbB registryreader fancypantspasswordThe nginx configuration was straight forward with some little help of ChatGPT
events {}
http {
server {
listen 80;
server_name localhost;
# Push (write access)
location ~* ^/v2/.*/blobs/uploads/ {
auth_basic "Push Access";
auth_basic_user_file /auth/htpasswd-write;
proxy_pass http://registry:5000;
}
location ~* ^/v2/.*/manifests/ {
auth_basic "Push Access";
auth_basic_user_file /auth/htpasswd-write;
proxy_pass http://registry:5000;
}
# Pull (read access)
location /v2/ {
auth_basic "Pull Access";
auth_basic_user_file /auth/htpasswd-read;
proxy_pass http://registry:5000;
}
}
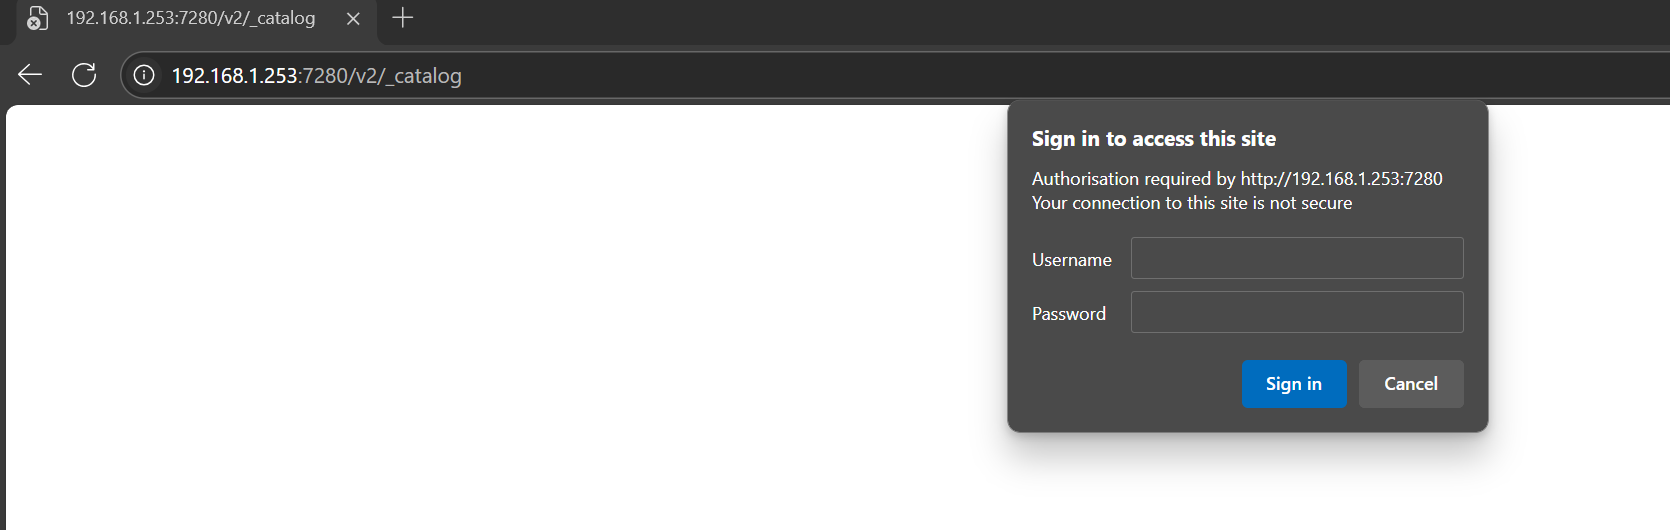
}A quick test on the via Unraid docker opened port 7280 showed indeed an authentication popup
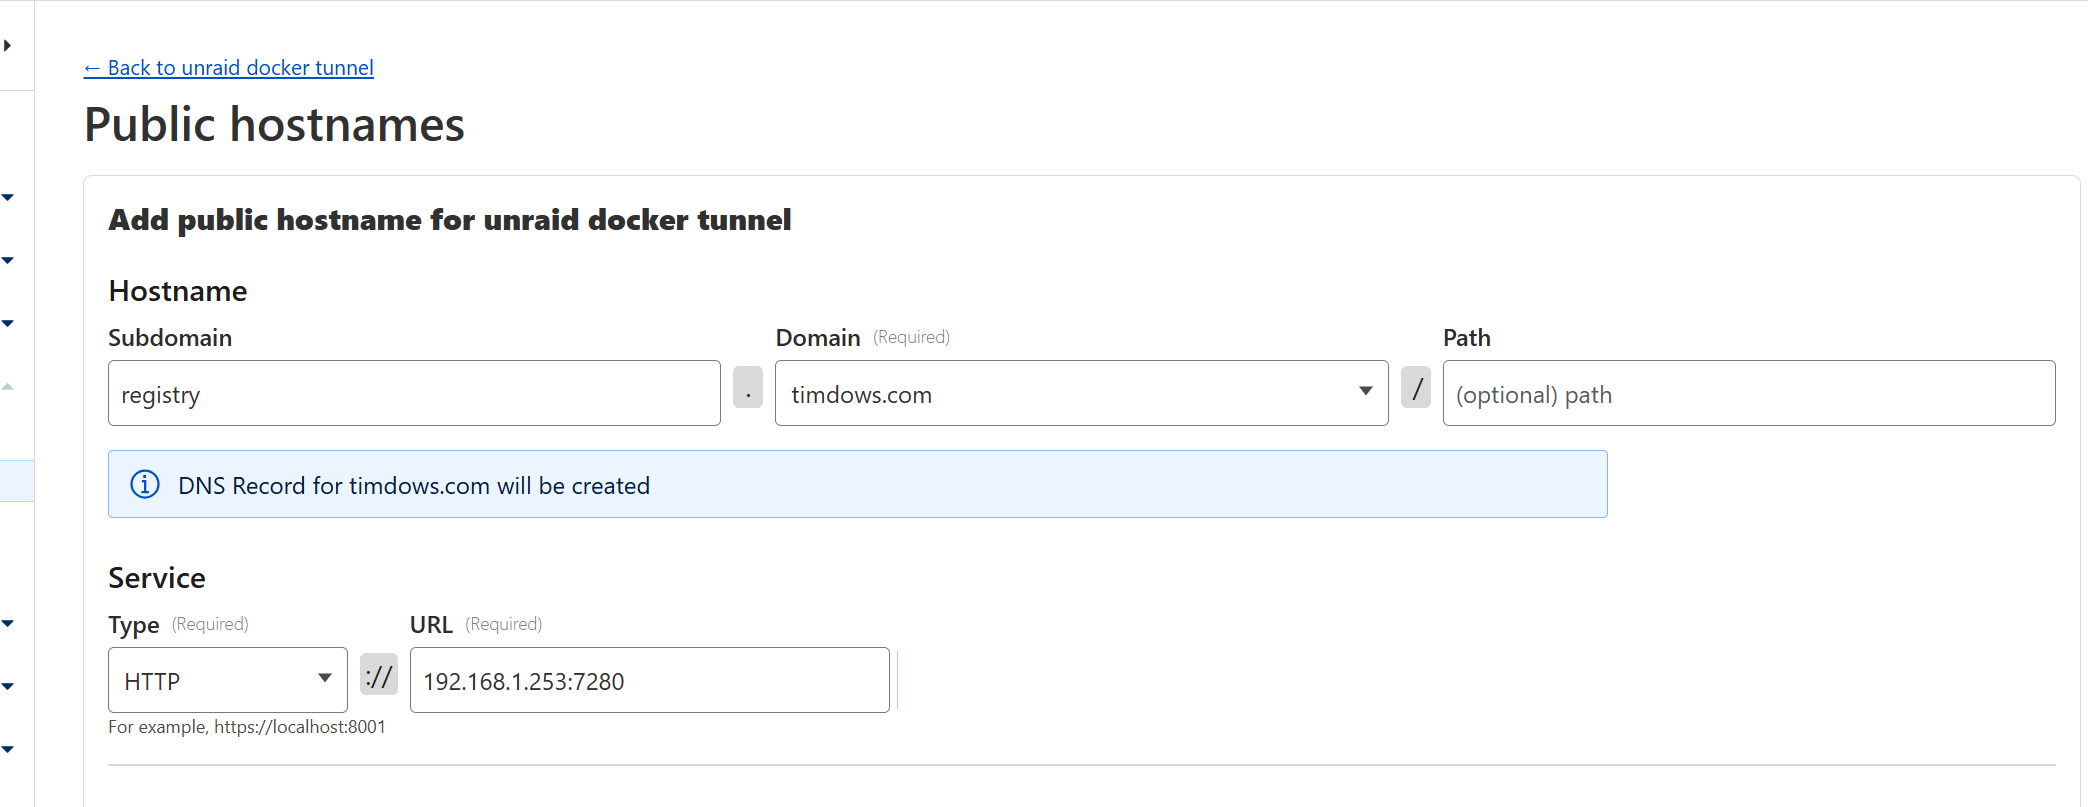
Now lets create the forward on CloudFlare. Note: I already have a complete CloudFlare Zero Trust configuration running, so the configuration only needed a subdomain on a public hostname configuration.
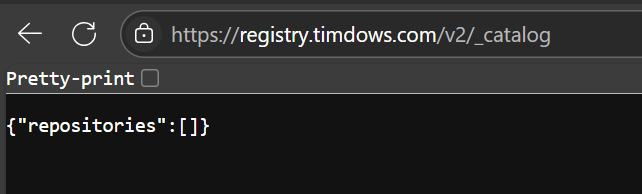
I love this, withing a minute I got this (and yes, this is after login with the reader account)
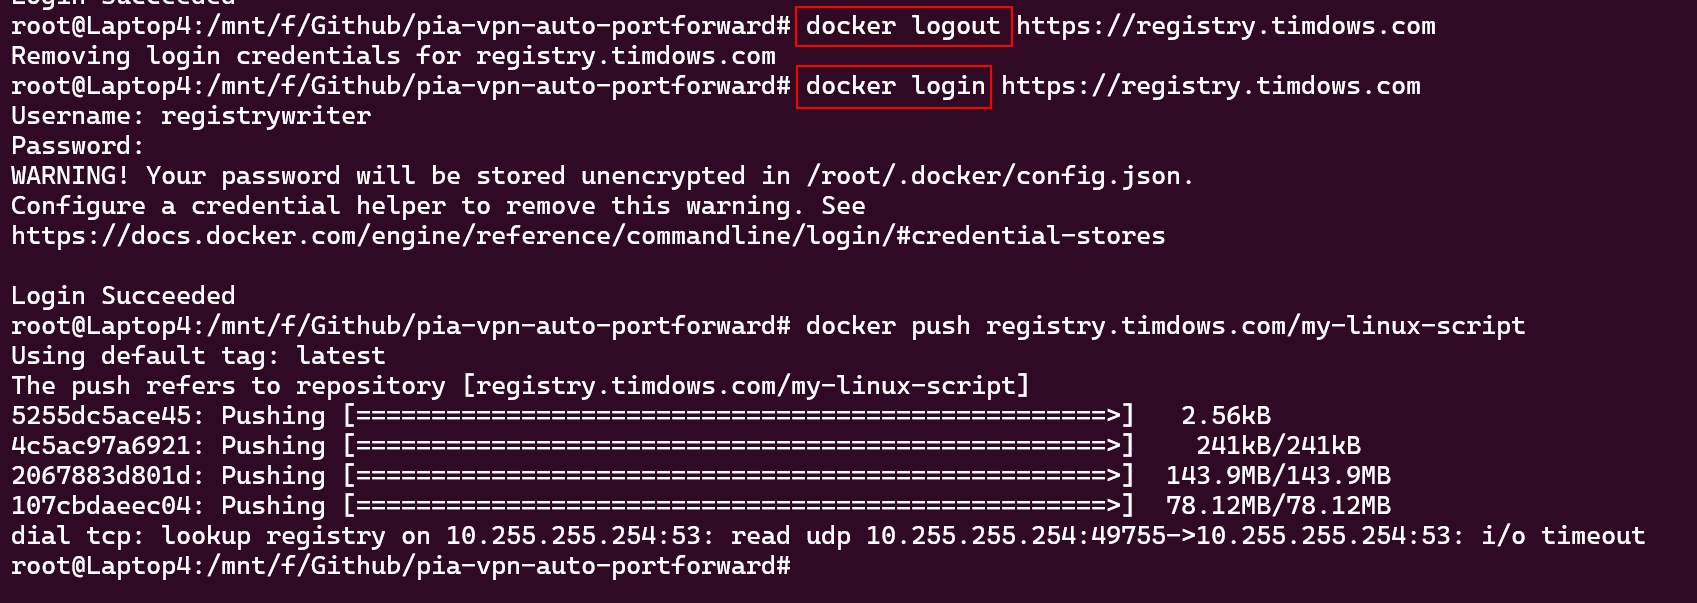
Lets push an image
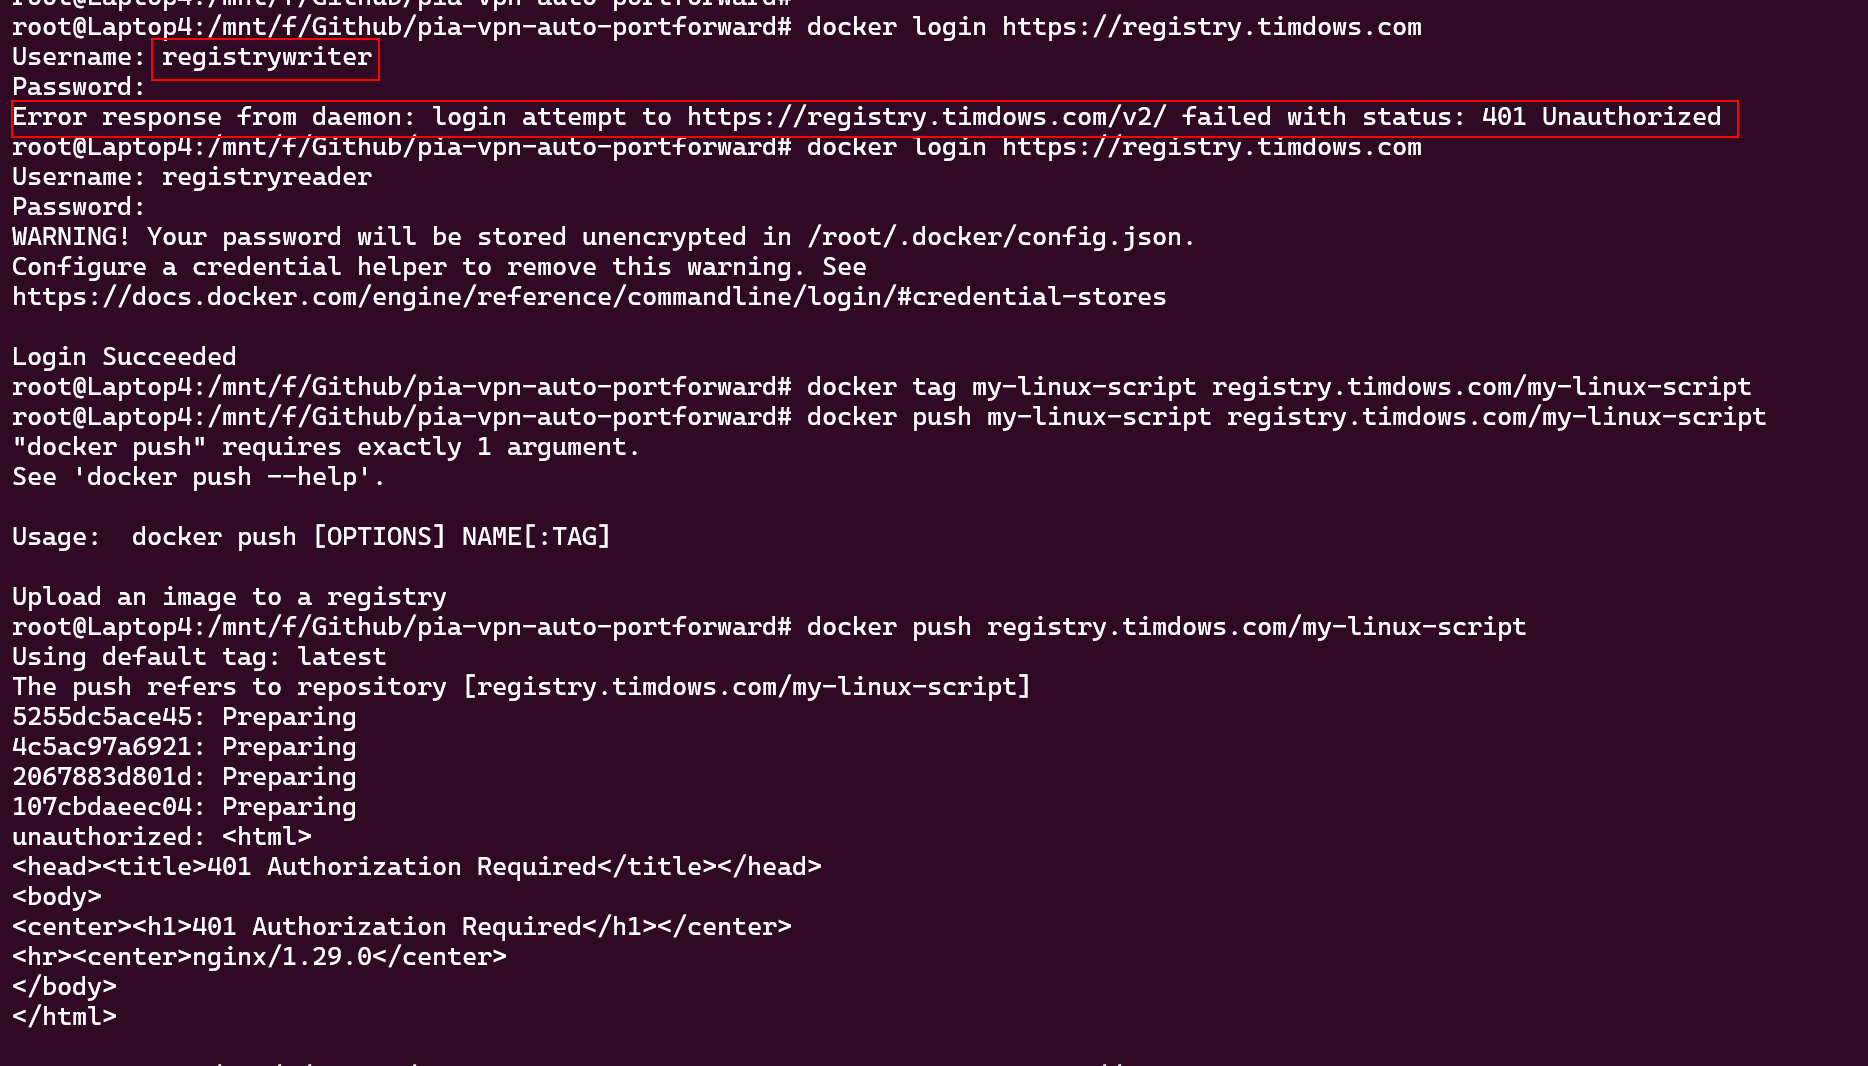
But the error is clear, I’ve not been able to login with the writer account
Lets add the writer account also to the reader file, so both accounts can login
After a logout and login, a push was possible, but I got some i/o errors
Docker repository try 2 with Gitlab CE

I have this notation that the first two digits determine the application group for the port, in my case 73xx

Next, lets delete the old cloudflare registry.timdows.com and create a new one for this gitlab ce server

And ofcourse also one for the ssh port, as git runs on ssh
